That is all.
Just needed to openly confess that desire and deep-seated need for a week-long break :)
running on fumes,
the craft rookie
Sunday, February 26, 2012
Tuesday, February 21, 2012
happy birthday!
happy birthday to my daddy!!!
you were born 53 years ago today, and what a great 53 years it has been :)
 |
| taken from http://birthdaycakecenter.blogspot.com |
love you!
sarah elise :)
Sunday, February 12, 2012
Multiplication Games
This past Thursday night, my school held a "Family Math Night" where each grade level (Pre-K to 4th) created 3 to 4 different Math games (more like ideas) that parents could take home and utilize with their kids.
Since I teach 4th Grade, our entire Math Night focused on Place Value to the 10ths and 100ths and Multiplication - memorization of the basic multiplication facts (which in Texas is 0-12...).
The other Math teacher for 4th Grade and I really scrambled over this night - we fretted over what games to play. We wanted the games to be FUN and also a way for our students to play with their parents or siblings - a shared learning experience. We didn't just want to do single player games - the focus of the night was, after all, FAMILY Math Night.
So, off we set until we came up with the following 4 actvities:
1. Place Value Sidewalk
Now, we cannot take credit for the inception of this game. It is a Kim Sutton activity that I borrowed from the 5th Grade teachers I worked with last year. I had seen them use it with their students with great success.

Now, it is ABSOLUTELY important that you read the instructions. You are placing your 4 digit number that you have created by rolling the die 4 times strategically along the place value sidewalk (pictured below).

So, if I were to roll 98.75 as my 4-digit number, I'd want to place it close to 100 on the far right side of the sidewalk.
Your partner is using the exact same numbers as you are, and they are placing them on their own board wherever they think is best.
Once you get to a point where your sidewalk is filling up, you very well might have a time where you've rolled the die and you cannot place your number anywhere. Your partner, however, might have the ability to place a number that you cannot since they are placing numbers on their own.
This is the only game I had parents asking a lot of questions about, but then we learned that they didn't read the instructions carefully.
2. What's My Factor?
This game is AWESOME! I LOVE it! I grew up playing Clue and detective games as a kid, and the part of me that enjoyed those games really gets to have fun with "What's My Factor?"
 What I love about this game?? It gets the students to not only practice their basic facts, but it also gets them to practice their VOCABULARY! Products and Factors, oh my, oh my! LOVE that they have to use their Math Vocabulary in order to play this game!
You can also alter this game for a younger student with Addition: "The sum of your two cards is _______."
You could also modify this to a 2 player game where 1 card is drawn from the deck and placed face up on the table. So, 1 player draws a card and places it on their forehead still, 1 card is drawn from the deck and placed face up on the table, and the 3rd player still uses their script from Step 2 above.
3. Multiplication Wrap-Ups
This is the only thing that our families were not able to "Take" with them from our 4th Grade Math station.
I remember having these things as a kid, and I would sit around the house on the weekends just playing with them. I was definitely your "nerd" who enjoyed school as a kid, but I know that even non-school-lovers enjoy these things. I have allowed a few of my students to take a set home with them, and I have seen some MAJOR progress happen in a very short amount of time.
Okay, back to reality...
Multiplication Wrap-Ups are AWESOME! The students love them - every time we have down time in class, I have kiddos raising their hands asking if they can get these bad boys out to play with. What do they look like??
Feast your eyes upon this:

They may not look like much, but the concept behind them is absolutely genius! These FAR exceed your typical Multiplication Flash Cards in getting kids to memorize their basic facts.
The kids like them because they are independent, kinesthetic, and they can time themselves to see how quickly they can get through each of their basic fact sets (x1, x2, x3, etc, etc).
I like them because I don't have to sit there and do flashcards with them. They are a self-guided activity. When the students are done and have gotten all the way to the bottom of the Wrap-Up stick, they turn it over to the back, and their string should match up perfectly with the Key on the back. If it doesn't, they investigate to figure out which ones they have wrong.
GENIUS!
Now, I know I said that this is one of those activities that we didn't allow parents to take home, BUT, we did provide information on where they can be purchased.
We were able to find them at a couple different places:
1. Mardel (a family Christian store)
2. Amazon.com (if you just search Multiplication Wrap-Ups, they pop up)
You can search it online at google, and a bunch of other retailers pop up, but those were the 2 that I found first, and frankly, they are 2 that I actually trust.
Side Note: They also have these for Addition, Subtraction, and Division!
4. Multiplication Battleship
This was by far my favorite game of the night. The other Math teacher and I wrote this game specifically for this night. We noticed a few things that needed to be tweaked on the instructions, and then we played it with our students the next day in class. They LOVED it! Girls and Boys were really getting in to it, and I just laughed as I walked around the room and saw kids celebrating their "Hits" and other kids in near crisis because their battleship was almost sunk!
I love the imagination of kids!
Alright, now on to the "How To" of this game...


The original directions are what is posted above.
Here are the few tweaks we made:
1. When calling off a multiplication problem, the first number they call would be the number across the top row, and the second number they call would be the number down in that column.
For Example, if I called 5x6 to "Hit" the product of 30, I would go ACROSS the top row to the 5, and then DOWN that column to the 6th multiple, which is 30. So, I would be hitting THAT 30. See the chart below:
 2. The 2nd tweak I made is that I thought it would be a good idea to make a note of where you've "MISSED" and "HIT" your opponents ships.
So, a MISS would be written as an "M" on the bottom right corner of that square, and a HIT would be written as a check mark in the bottom right corner of that square. Observe, the "M" and Check Mark in the 0x0 and 0x1 boxes below.

Those are all the things we pulled together for our Family Math Night. Hopefully, you can tweak these games to your liking, or enjoy them as-is! I would love to hear your feedback on what else you think would work well for these games!

Since I teach 4th Grade, our entire Math Night focused on Place Value to the 10ths and 100ths and Multiplication - memorization of the basic multiplication facts (which in Texas is 0-12...).
The other Math teacher for 4th Grade and I really scrambled over this night - we fretted over what games to play. We wanted the games to be FUN and also a way for our students to play with their parents or siblings - a shared learning experience. We didn't just want to do single player games - the focus of the night was, after all, FAMILY Math Night.
So, off we set until we came up with the following 4 actvities:
1. Place Value Sidewalk
Now, we cannot take credit for the inception of this game. It is a Kim Sutton activity that I borrowed from the 5th Grade teachers I worked with last year. I had seen them use it with their students with great success.

Now, it is ABSOLUTELY important that you read the instructions. You are placing your 4 digit number that you have created by rolling the die 4 times strategically along the place value sidewalk (pictured below).

So, if I were to roll 98.75 as my 4-digit number, I'd want to place it close to 100 on the far right side of the sidewalk.
Your partner is using the exact same numbers as you are, and they are placing them on their own board wherever they think is best.
Once you get to a point where your sidewalk is filling up, you very well might have a time where you've rolled the die and you cannot place your number anywhere. Your partner, however, might have the ability to place a number that you cannot since they are placing numbers on their own.
This is the only game I had parents asking a lot of questions about, but then we learned that they didn't read the instructions carefully.
2. What's My Factor?
This game is AWESOME! I LOVE it! I grew up playing Clue and detective games as a kid, and the part of me that enjoyed those games really gets to have fun with "What's My Factor?"

You can also alter this game for a younger student with Addition: "The sum of your two cards is _______."
You could also modify this to a 2 player game where 1 card is drawn from the deck and placed face up on the table. So, 1 player draws a card and places it on their forehead still, 1 card is drawn from the deck and placed face up on the table, and the 3rd player still uses their script from Step 2 above.
3. Multiplication Wrap-Ups
This is the only thing that our families were not able to "Take" with them from our 4th Grade Math station.
I remember having these things as a kid, and I would sit around the house on the weekends just playing with them. I was definitely your "nerd" who enjoyed school as a kid, but I know that even non-school-lovers enjoy these things. I have allowed a few of my students to take a set home with them, and I have seen some MAJOR progress happen in a very short amount of time.
Okay, back to reality...
Multiplication Wrap-Ups are AWESOME! The students love them - every time we have down time in class, I have kiddos raising their hands asking if they can get these bad boys out to play with. What do they look like??
Feast your eyes upon this:

They may not look like much, but the concept behind them is absolutely genius! These FAR exceed your typical Multiplication Flash Cards in getting kids to memorize their basic facts.
The kids like them because they are independent, kinesthetic, and they can time themselves to see how quickly they can get through each of their basic fact sets (x1, x2, x3, etc, etc).
I like them because I don't have to sit there and do flashcards with them. They are a self-guided activity. When the students are done and have gotten all the way to the bottom of the Wrap-Up stick, they turn it over to the back, and their string should match up perfectly with the Key on the back. If it doesn't, they investigate to figure out which ones they have wrong.
GENIUS!
Now, I know I said that this is one of those activities that we didn't allow parents to take home, BUT, we did provide information on where they can be purchased.
We were able to find them at a couple different places:
1. Mardel (a family Christian store)
2. Amazon.com (if you just search Multiplication Wrap-Ups, they pop up)
You can search it online at google, and a bunch of other retailers pop up, but those were the 2 that I found first, and frankly, they are 2 that I actually trust.
Side Note: They also have these for Addition, Subtraction, and Division!
4. Multiplication Battleship
This was by far my favorite game of the night. The other Math teacher and I wrote this game specifically for this night. We noticed a few things that needed to be tweaked on the instructions, and then we played it with our students the next day in class. They LOVED it! Girls and Boys were really getting in to it, and I just laughed as I walked around the room and saw kids celebrating their "Hits" and other kids in near crisis because their battleship was almost sunk!
I love the imagination of kids!
Alright, now on to the "How To" of this game...

The game board:

The original directions are what is posted above.
Here are the few tweaks we made:
1. When calling off a multiplication problem, the first number they call would be the number across the top row, and the second number they call would be the number down in that column.
For Example, if I called 5x6 to "Hit" the product of 30, I would go ACROSS the top row to the 5, and then DOWN that column to the 6th multiple, which is 30. So, I would be hitting THAT 30. See the chart below:

So, a MISS would be written as an "M" on the bottom right corner of that square, and a HIT would be written as a check mark in the bottom right corner of that square. Observe, the "M" and Check Mark in the 0x0 and 0x1 boxes below.

Those are all the things we pulled together for our Family Math Night. Hopefully, you can tweak these games to your liking, or enjoy them as-is! I would love to hear your feedback on what else you think would work well for these games!

(Photo courtesy of Warner Brothers)
I loved Porky Pig's stutter,
the craft rookie
Tuesday, February 7, 2012
Really cool idea ALERT!
Ohhhh, I LOOOOVE when I stumble across a really awesome idea. I get all giddy and excited because not only do I get to put the idea to use, but I also get to share it with anyone who will listen!
Today's idea comes from a Special Education teacher at the school I work at.
There is a student in my class that has struggled every day since the beginning of school in August to remember how to start class - the routines and procedures that have been in place since Day 1. Now, this student is completely and utterly lovable, but we are wanting him to get to a point where he is more independent on getting started with each class (because they rotate through 3 different teachers).
Up until this point, this student would just sit there at his desk and be afraid to ask "What am I supposed to be doing?" So, in pops that Special Education teacher like a Fairy Godmother!
I was referred to her by my Principal because she has worked with students like this in the past and has many, many, many ideas and strategies to help them manage their days.
The strategy that we decided on for my little kiddo is a "How to Start Class" folder that he will carry with him to each of his teacher's classes.
There are 4 parts to our students' days at my school, so she broke it down in to 4 sections:
1. How to start.... My Morning - arriving at school and listening to announcements
2. How to start....My Writing/Social Studies Class
3. How to start....My Reading/Science Class
4. How to start....My Math Class
She put the task lists in order from the beginning to the end of his day and in order of what he's supposed to do first, second, third, etc etc in each class.
Wondering what it looks like???
OBSERVE....


The COOLEST part about this little folder is that it is made with Velcro, which makes any task list immediately better!
There are 2 lines of Velcro. If his task is sitting on the left line of Velcro, it is a "To Do," and as soon as he has finished that task, he moves it over to the line of Velcro on the right, which is aptly named the "Done" column.
What I love even more about this idea is that I am able to share it with his mom with the hope that she can find a way to tweak it to her needs for all of his routines at home. She and I have had many talks this year about what a struggle it is to get him to follow a morning routine. She's created checklists that hang on the wall, she's done picture checklists, she's done verbal lists - calling it off 1 item at a time. Basically, she's done everything she could think of and was, ultimately, getting nowhere.
My hope is that she can create something like this for him at home so that there is a sense of consistency for what to look for to know what to do.
I also let her know that, due to our students moving in to Middle School next year, it would be a great tool for her to tweak and re-create for an increased number of teachers and, hopefully, help him achieve a higher level of independence.
I'm hearing Velcro rip somewhere...and it's a beautiful thing,
the craft rookie
Sunday, February 5, 2012
make-up holder mash-up!
Okay, so...as some of you may know, I'm not the type to just take a craft and do it. I have to, in some way, make it my own. Or, I take multiple different ideas and put them together in one.
Today's craft is of the latter persuasion. It is a makeup holder that you can mount on the wall. I took 2 different ideas found from Pinterest (fancy that), and put them together to create something that I have LOVED every day since I finished it :) The 2 ideas can be found here and here.
I think I spent maybe $15 total on this project! When I originally went to complete this project, I tried following this tutorial, I bought a frame for $20 and then went to go pick up some sheet metal, but none of the pre-cut sheet metal fit my frame, and none of the stores (Lowe's, Home Depot, ACE) would cut it for me. They said I'd have to cut it myself, which is why I went back to the drawing board and came up with a way to do this cheap, easy, and painless. :)
I don't have any "in progress" photos, but I have the final product and can explain to you everything I did to create it.
Materials
- Baking sheet
- Fabric
- Adhesive Spray Glue
- Hot Glue
- 1 pkg Magnets (can be found at Wal Mart) - regular fridge magnets
- 2 pkgs More magnets (also found at WM) - the STRONG kind
- Small plastic cups (found mine at Target)
- Raffia (it's the stuff that looks like hay)
- Screws (x2)
- A handyman that will use their electric drill
How to...
1. Take your baking sheet - it can be any size (I would say stick to Small or Medium, though, depending on how much make up you are wanting to display on yours) and your Fabric. Measure and cut your fabric so that it will cover the front bottom of the pan (read that as..do not cover the border/lip of the pan).
2. Spray the Adhesive Glue on to the front bottom of the pan and lay the cut fabric down to secure it in place. Be very careful on this step, as the Adhesive Glue has a tendency to dry fast (at least mine did) so once your fabric hits it, it is gonna stay there. Also, don't mash the fabric down once you have it in place - this can allow the adhesive glue to bleed through the fabric and discolor it. Just lightly smooth out the fabric.
3. Take the Raffia and line all the edges of the pan so that the frayed edges of the fabric (from being cut) are hidden. I used about 4-5 strings of Raffia to do this on each side. I also tried to use long strings of raffia that would turn the corner and continue lining the next side. It made for a not so obvious switch when one string ran out and you needed to start another. Glue this down with dots of hot glue. You don't want to make it so secure that it looks tight. Allow it to have some looseness to it.
4. Next, take some more raffia and tie a loose bow using about 5-6 strings. Glue that bow down in one of the corners. You can repeat this as much as you please. I only used 1 because Raffia in itself is a little boisterous and busy.
5. Take one of the cups you bought, and hot glue 3 of the STRONG magnets in vertical line on the side that you don't want facing out. Repeat this with the 2nd cup.
6. Take your makeup, and glue the other magnets (the refrigerator ones) to the back using your hot glue.
7. Get your local/home handyman to help you hang this up using the screws. I found screws were the only way to hang it because you'd have to hammer through the metal of the baking sheet to nail it up. The electric drill helps IMMENSELY.
8. Put your cups and makeup on the board in whatever placement you desire. Note: I used one of the cups for my makeup brushes and the other holds my lip gloss, eye liner, and mascara. I chose not to put magnets on those items because I take those things with me when I'm going out.

I chose to keep it simple and only put the make up on there that I use every day. I don't use eye shadows or 6 different blushes each week, so I just have my basics.
Today's craft is of the latter persuasion. It is a makeup holder that you can mount on the wall. I took 2 different ideas found from Pinterest (fancy that), and put them together to create something that I have LOVED every day since I finished it :) The 2 ideas can be found here and here.
I think I spent maybe $15 total on this project! When I originally went to complete this project, I tried following this tutorial, I bought a frame for $20 and then went to go pick up some sheet metal, but none of the pre-cut sheet metal fit my frame, and none of the stores (Lowe's, Home Depot, ACE) would cut it for me. They said I'd have to cut it myself, which is why I went back to the drawing board and came up with a way to do this cheap, easy, and painless. :)
I don't have any "in progress" photos, but I have the final product and can explain to you everything I did to create it.
Materials
- Baking sheet
- Fabric
- Adhesive Spray Glue
- Hot Glue
- 1 pkg Magnets (can be found at Wal Mart) - regular fridge magnets
- 2 pkgs More magnets (also found at WM) - the STRONG kind
- Small plastic cups (found mine at Target)
- Raffia (it's the stuff that looks like hay)
- Screws (x2)
- A handyman that will use their electric drill
How to...
1. Take your baking sheet - it can be any size (I would say stick to Small or Medium, though, depending on how much make up you are wanting to display on yours) and your Fabric. Measure and cut your fabric so that it will cover the front bottom of the pan (read that as..do not cover the border/lip of the pan).
2. Spray the Adhesive Glue on to the front bottom of the pan and lay the cut fabric down to secure it in place. Be very careful on this step, as the Adhesive Glue has a tendency to dry fast (at least mine did) so once your fabric hits it, it is gonna stay there. Also, don't mash the fabric down once you have it in place - this can allow the adhesive glue to bleed through the fabric and discolor it. Just lightly smooth out the fabric.
3. Take the Raffia and line all the edges of the pan so that the frayed edges of the fabric (from being cut) are hidden. I used about 4-5 strings of Raffia to do this on each side. I also tried to use long strings of raffia that would turn the corner and continue lining the next side. It made for a not so obvious switch when one string ran out and you needed to start another. Glue this down with dots of hot glue. You don't want to make it so secure that it looks tight. Allow it to have some looseness to it.
4. Next, take some more raffia and tie a loose bow using about 5-6 strings. Glue that bow down in one of the corners. You can repeat this as much as you please. I only used 1 because Raffia in itself is a little boisterous and busy.
5. Take one of the cups you bought, and hot glue 3 of the STRONG magnets in vertical line on the side that you don't want facing out. Repeat this with the 2nd cup.
6. Take your makeup, and glue the other magnets (the refrigerator ones) to the back using your hot glue.
7. Get your local/home handyman to help you hang this up using the screws. I found screws were the only way to hang it because you'd have to hammer through the metal of the baking sheet to nail it up. The electric drill helps IMMENSELY.
8. Put your cups and makeup on the board in whatever placement you desire. Note: I used one of the cups for my makeup brushes and the other holds my lip gloss, eye liner, and mascara. I chose not to put magnets on those items because I take those things with me when I'm going out.
Final product? Here it is....

I chose to keep it simple and only put the make up on there that I use every day. I don't use eye shadows or 6 different blushes each week, so I just have my basics.
Baking sheet love,
the craft rookie
Saturday, February 4, 2012
teaching weathering in song!
So, I used to work out at a Summer Camp called Sky Ranch.
Sky didn't only have a Summer Camp, they also had an Outdoor Education camp, which is the actual department I worked in for my year-long tenure.
Basically, we brought different schools out to our camp ground throughout the school year. Schools would stay anywhere from just being there for 1 day to staying for 5 days. During their time on our camp-grounds, we took the students out around our property to teach them Science in the great outdoors.
One of the classes I got a chance to teach a lot was a class called "Forces of Nature". This class was all about the natural forces at work that most people don't even think about. We focused on Gravity, Friction (including Wind Resistance), Weathering, Erosion, and Deposition. The Gravity and Friction sections of the class were easy to teach. We got to take the kids to our Zip Line and Rocket-building area and run different experiments with them.
The Weathering/Erosion/Deposition (W-E-D from here on out) section was the beating - not just for the students, either. It was very dry and very difficult to make exciting, especially after the Zip Line and Rockets sections! Not to mention, W-E-D is very abstract and hard to imagine for a 4th-6th grader.
So, we came up with a song. "Weathering Breaks it. Erosion Takes it..." and then we couldn't figure out how to finish it off.
Last year, I worked at a Middle School where I got to tutor kids in Science. And, wouldn't you know it, my favorite topic came up in tutoring: none other than W-E-D! I taught my students the song from Sky Ranch, and then I filled them in on the fact that we couldn't figure out a way to include deposition, too.
So, they put their brains to work, and this is what they came up with:

Say it to any beat. Fast. Slow. Medium.
Say it in any voice. Normal. Witch. Cowpoke. New Yawkuh (or is that Jersey?).
With the last line, you slow down on the word "Deposition" by emphasizing each syllable.
You can even add hand motions for the kinesthetic learners!
proud of my students,
the craft rookie
melissa's door announcement wreath thingamajig!!
So, as I mentioned around Thanksgiving, my brother and sister-in-law are expecting a baby girl. Well, Melissa, that's the preggers one, found a cute craft on Pinterest for a wreath to hang outside the hospital door announcing the sex of the baby.
So, today's craft comes from my sister-in-law by way of Pinterest (yes...the addiction extends into my extended family...how's that for using some form of the word extend twice in one sentence?!).
She started with:

- Tulle (sound it out...yep, that's confusing. Say "tool"...there ya go). She bought 2 different colors for her wreath

- Ribbon to match the Tulle
- Scissors
How To...
1. Take the Tulle and cut equal pieces in length - hers were about a foot long each (maybe slightly less).

2. Start tying the strips of Tulle on to the pool ring by folding the Tulle strip in half, then laying it over the edge of the pool ring and pulling the free ends of the Tulle through the loop of the Tulle. You should end with a loop that it's attached to the pool ring.
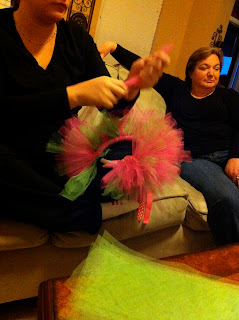

3. Repeat step 2 with alternating colors. She did 2 pink, 1 green, 2 pink, 1 green...I think you see the pattern :)


The final product?? It can be seen on her Pinterest page here. The one she made for her sister-in-law can be found here. Or, you can just keep scrolling down :) I know..I'm tricky like that!


The one above (with the hot pink) is Melissa's. She also made one for HER sister-in-law, Kelly, who is also pregnant and also having a baby...that's a lot of "also"!

What was I doing while she was creating these awesome wreaths, you ask? Well, first of all, thank you for caring about me. And second of all, I was diligently paying attention to the Harry Potter movies that we were watching. We decided to continue our HP marathon that we started on Thanksgiving..2 years ago :). And, third of all, THIS is what I was doing:


So, today's craft comes from my sister-in-law by way of Pinterest (yes...the addiction extends into my extended family...how's that for using some form of the word extend twice in one sentence?!).
She started with:
- A pool ring - bought at the Dollar Store

- Tulle (sound it out...yep, that's confusing. Say "tool"...there ya go). She bought 2 different colors for her wreath

- Ribbon to match the Tulle
- Scissors
How To...
1. Take the Tulle and cut equal pieces in length - hers were about a foot long each (maybe slightly less).

2. Start tying the strips of Tulle on to the pool ring by folding the Tulle strip in half, then laying it over the edge of the pool ring and pulling the free ends of the Tulle through the loop of the Tulle. You should end with a loop that it's attached to the pool ring.
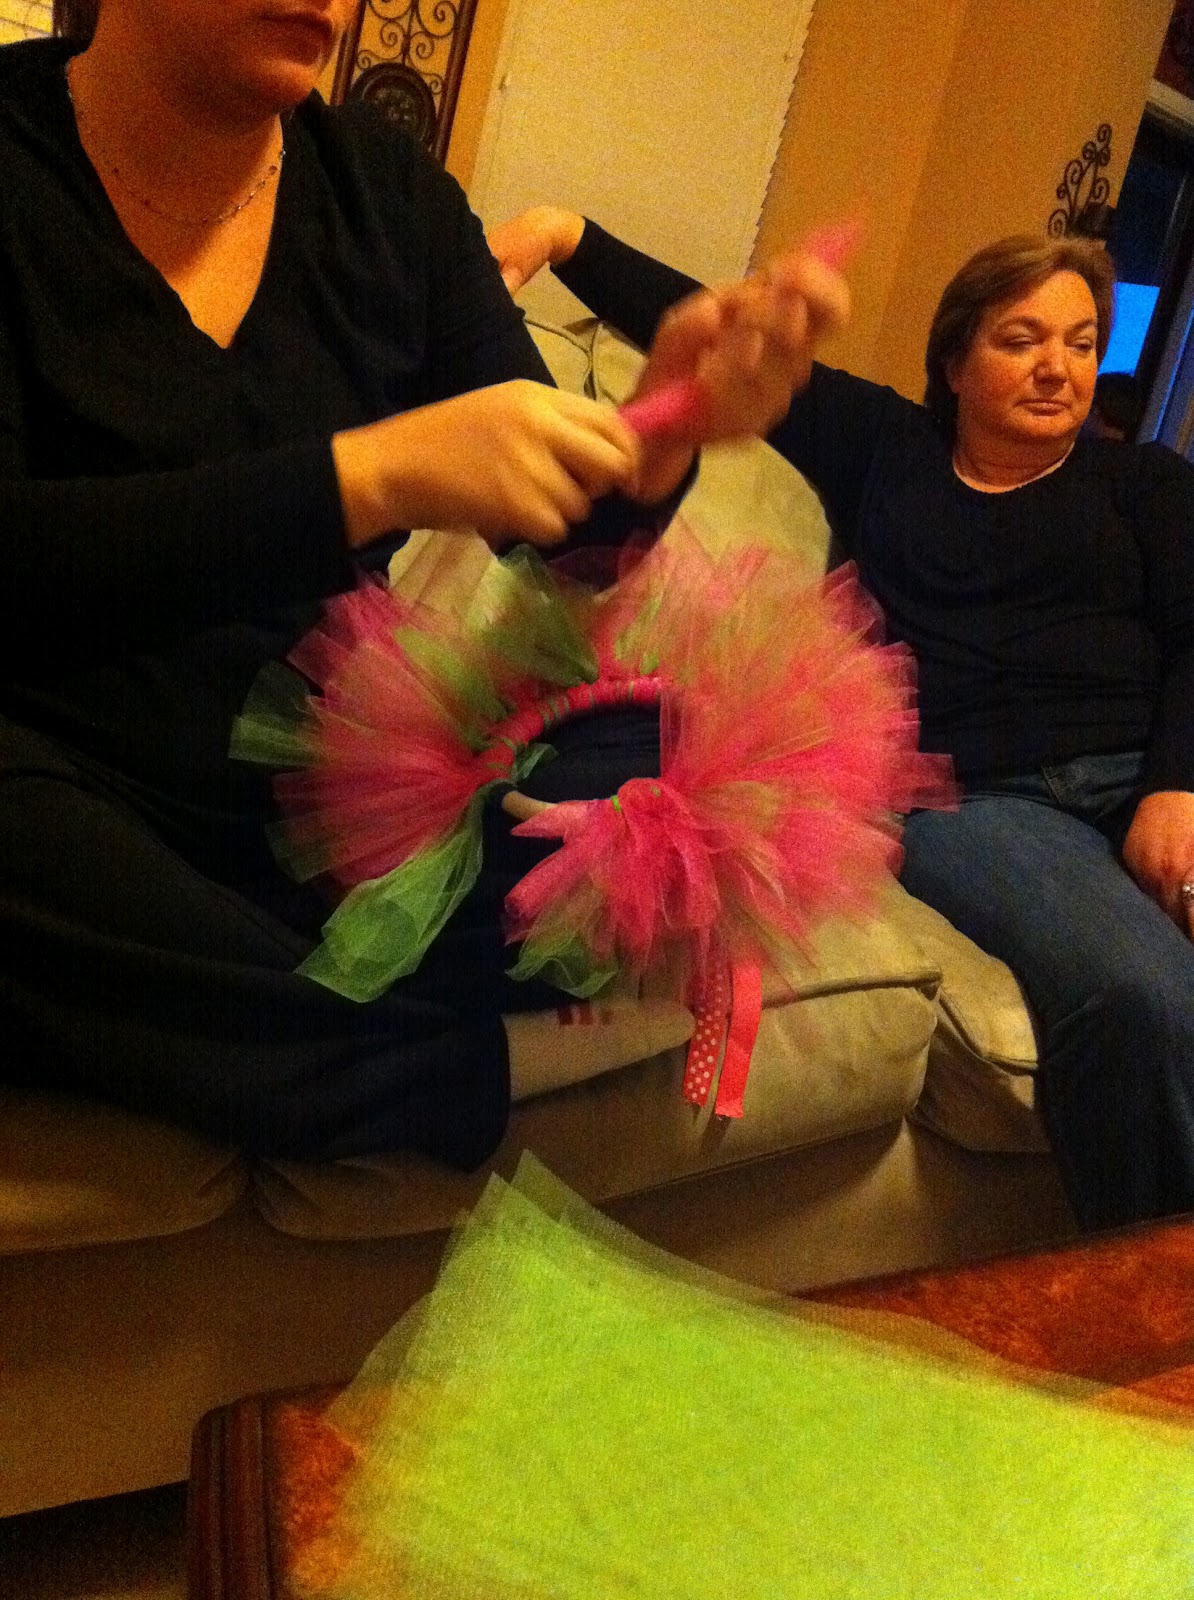

3. Repeat step 2 with alternating colors. She did 2 pink, 1 green, 2 pink, 1 green...I think you see the pattern :)

4. When you're done, you can hang it up with ribbon.

The final product?? It can be seen on her Pinterest page here. The one she made for her sister-in-law can be found here. Or, you can just keep scrolling down :) I know..I'm tricky like that!


The one above (with the hot pink) is Melissa's. She also made one for HER sister-in-law, Kelly, who is also pregnant and also having a baby...that's a lot of "also"!

What was I doing while she was creating these awesome wreaths, you ask? Well, first of all, thank you for caring about me. And second of all, I was diligently paying attention to the Harry Potter movies that we were watching. We decided to continue our HP marathon that we started on Thanksgiving..2 years ago :). And, third of all, THIS is what I was doing:


I played with the dogs. Hallie, the one in the picture with me, got a little kiss-happy.
I also blew up balloons for my nephew to play with...and play with them, he did.

He fashioned himself a mustache....and then, I learned how to spell mustache.

He made himself very large lips...

...and then hammed it up for the camera
And then I hung out with my nephew s'more..but no, we didn't make s'mores (although, now I wish we had...s'mores...yummm...).

Here he is in the process of blowing up a balloon (he had a little hand pump).

Let's just say the hand pump was less than great...so, he sat there for a while with a non-inflated balloon :)

I decided to take a picture of him in his basketball jersey. He's doing SOOOO good with his basketball team! They had played earlier that day, and they had won! He also got a basket that both his mom and I missed because we were deep in conversation. Don't fault us for that...it wasn't his first basket in a game. So, we felt bad, but not so terribly bad!
I also took this photo because I thought it was cute that we both put our feet up on the table like that...
And finally, the last thing I did...

Confuse the crap outta the other dog, Keely. Then, I did it again so I could take this photo :)
Only HP 7 Pt 1 and 2 left!
the craft rookie
Wednesday, February 1, 2012
I seem to be having technical difficulties...
new blog post coming soon! whenever i can figure out why my internet doesn't want to work..
i'm trying to upload pictures to a post, but i guess my internet thinks pictures are bunk!
becoming a computer geek,
the craft rookie :)
i'm trying to upload pictures to a post, but i guess my internet thinks pictures are bunk!
becoming a computer geek,
the craft rookie :)
Subscribe to:
Comments (Atom)